Showing posts with label tips. Show all posts

Tuesday, March 20, 2012

Thursday, September 29, 2011

Thursday, April 14, 2011

Thursday, December 16, 2010

Many Uses for Baking Soda

1. One of the most popular uses for baking soda is to deodorize your refrigerator. Just place an open container inside, stir every couple of weeks, replace it every couple of months.

2. After you have used the baking soda in the refrigerator, don't throw it away! Put it in the sink drain or garbage disposal. Add a cup of vinegar and let it stand overnight. Run hot water through it in the morning; it will help keep drains clean and smelling fresh.

3. One of the more important uses for baking soda: Keep a box of baking soda near the stove. In case of a grease fire, you can sprinkle baking soda on the fire to extinguish the flames. This will not damage counter tops or the pans. It is safe for use on electrical fires.

4. Baking soda will also put out fires from gasoline, burning clothes, rugs and upholstery.

5. Give your deck a weathered look by adding two cups of baking soda to one gallon of water. Use a stiff brush to spread onto the surface area. Work in the direction of the grain. Let it sit for an hour then rinse with cool water.

6. Acid burns caused by battery acid, drain openers and toilet bowl cleaners can be neutralized by immediately washing the area with cold water. Then sprinkle baking soda on the effected area.

7. With a damp cloth, sprinkle dry baking soda on it to make a great cleaner for refrigerators, freezers and fiberglass shower stalls.

8. For stains on marble, formica, or plastic surfaces, a paste of baking soda and water will clean them up quick and easy.9. Thermos bottles can be cleaned by putting 2 tablespoons of baking soda inside. Add hot water until it is ¾ full. Put the cap on and shake for several minutes. Drain and rinse. It will be clean as new.

10. After using coolers, mix baking soda and water to wipe down the inside to get rid of odors. Rinse out, let dry and store them. Put some baking soda in a small plastic container. Put holes in the lid and store it inside of your cooler. The cooler will smell fresh for the next time you use it.

11. Wash glass or stainless steel coffee pots with some baking sode. It will remove the film that builds up on the inside. It will also make your coffee taste better. Never use on aluminum coffee pots.

12. To clean the inside working area of coffeemakers: Mix baking soda, 2 tablespoons in 10 cups of water, and run it through its cycle. Dump water down the drain (yes its good for the drain). Then run one more pot of water through to rinse remaining residue from the inside of the coffeemaker.

13. Uses for baking soda and babies: To help clean baby bottles, wash the bottles with water and baking soda. Then rinse well with hot water.

14. Soak stale-smelling sponges in a strong baking soda solution to keep them fresh

15. Add 1/4-1/2 cup of baking soda to your wash detergent. It will make your clothes smell fresher, help remove stains and will make your expensive detergents go further.

16. To polish silverware sprinkle dry baking soda on a damp cloth rub, rinse, dry and enjoy.

17. Use baking soda in your dishwasher. Run the dishwasher through a cycle with the baking instead of soap. Tang is also good to keep your dishwasher clean and smelling good.

18. For stainless steel and chrome, use a moist cloth and dry baking soda to make it shine like new. Rinse and dry. On stainless steel, rub in the direction of the grain.

19. To remove strong odors from your hands, wet your hands and place a little baking soda on them. Rub them together, rinse and dry. Odor will be gone.

20. Chlorine from the swimming pool can turn your hair green. To prevent this, after swimming rinse your hair with lemon juice and a 1/4 cup of baking soda. Rinse and shampoo as you normally do.

21. To maintain proper pool alkalinity, add 3/4 lb. of baking soda for every 5,000 gallons of water. This will raise the total alkalinity by 10 ppm (parts per million). Most pools require alkalinity in the 80-150 ppm range. Proper pool alkalinity level is vital for minimizing changes in pH or when basic pool chemicals or contaminants are introduced into the water.

22. Add 1/2 cup or more of baking soda to your bath water to soften your skin.

23. Putting 2 tbsp. of baking soda in your baby's bath water will help relieve diaper rash irritations.

24. If you put baking soda in your bath water, it will help with skin irritations and will also sooth the itching from measles and chickenpox.

25. Ring around the collar can be removed using a paste made with baking soda and a little water. Apply to affected area. Rub in. Then let it sit for two hours. Rinse. For stubborn stains you may need to put white vinegar on the stain. Then wash as you normally would.

26. Lawn furniture that is resin based can be cleaned safely if you wet a sponge, dipped into baking soda. Wipe on in a circular motion, then rinse well. Your lawn furniture is back to looking new

27. Weeds growing in the cracks of your driveway, sidewalks and patio? A good safe way to help prevent them from growing is to put baking soda on them. Add a handful, then sweep it into the cracks. The added sodium will help make it more hostile to the weeds growing there. It's safe for pets and children as well.

28. For the best omelets in the world, just like the ones grandma use to make, add 1/2 teaspoon of baking soda for every three eggs that you use. Mmmmm good.

29. Icing for cakes will spread smoother and prevent the icing from cracking if you add just a pinch of baking soda as you make it.

30. Wearing a plaster cast on a broken bone can be miserable any time of the year. But it always seems to itch and rub more in the summer time when its hot and sticky. To help relive the itchiness, use a hair dryer set on the coolest setting to blow baking soda into the cast. This works best if you have some help you.

31. Take 1/2 teaspoon of baking soda in 1/2 glass of water to relieve acid indigestion or heartburn.

32.Sprinkle soda in tennis shoes, socks, boots and slippers to eliminate odor.

33. To remove burned-on food from a pan: let the pan soak in soda and water for 10 minutes before washing. Or scrub the pot with dry soda and a moist scouring pad.

34. Give baby bottles a good cleaning with soda and hot water

35. To make your own baking powder, stir and sift together 2 parts of Cream of Tartar to 1 part baking soda and 1 part cornstarch

36. Clean formica counter tops with baking soda on a damp sponge.

37. Soda absorbs kitty litter odors. Cover the bottom of the kitty box with 1 part soda; then add a layer of 3 parts kitty litter on top.

38. Making play clay with baking soda: Combine 1-1/4 cups water, 2 cups soda, 1 cup cornstarch.


39. Repel rain from windshield. Put gobs of baking soda on a dampened cloth and wipe windows inside and out.

40. Use dry with a small brush to rub canvas handbags clean


41. Oil on garage floors sprinkle baking soda on the spill to absorb the extra oil then scrub the floor with hot water and a stiff bristle brush, stains are gone.

42. To remove blood stains from clothing place them under cool running water then sprinkle on baking soda. Gently rub the fabric into itself and then place under cool water, repeat if needed.

43. Nail holes, cracks in the walls and/or ceiling can easily be repaired by mixing a little white glue with baking soda. Press into crack or nail hole let dry, then use your touch up paint to match, the nail holes and cracks have disappeared

44. Ant and roach control mix equal parts of baking soda with sugar and spread over the infested area, they love the sugar the baking soda loves them to death.

45. For beautiful more manageable hair add a little bit of baking soda in you hand size of a quarter will be enough, add your shampoo. Shampoo as you normally do, this will help remove the residue that builds from styling products that you use and will make your hair clean and shiny.

46. Add a sprinkle of baking soda when you soak dried beans it will help them cook quicker and make them more digestible


48. Stuffed toys that get old and have a stale smell can be refreshed by simply giving them a dusting of baking soda let them sit for 10-15 minutes. Pat the baking soda off and you have a fresh smelling stuffed toy again. It is safe for children and the stuffed toy as well.

49. Something smelling fishy about the fish you bought at the store. Eliminate the smell by soaking the fish in a quart of water with two tablespoons of baking soda. Keep refrigerated for an hour, pat dry before cooking.

50. Clean vegetables and fruit with baking soda. Sprinkle in water, soak and rinse the produce

51. Put 1/4 cup of baking soda and 1/2 cup of your favorite potpourri inside old panty hose. For odor-removing sachets, tie the top shut with ribbon and place in hampers, closets, or other areas that end up with bad odors.

52. Minimize the "oh gross" factor by cleaning and freshening retainers and mouth-guards with baking soda. Soak after every use in a solution of 2 teaspoons baking soda and warm water. Every so often, brush them clean with a paste of baking soda. That’ll keep everyone smiling

53. Spicy food is yummy until it bothers the tummy. Baking soda is a safe and effective antacid to relieve heartburn, sour stomach and/or acid indigestion, when used as directed. Always refer to the baking soda package for instructions. Learn more about how baking soda works as an antacid.

54. For locks of hair that look great, remember to shake it. Sprinkle a small amount (quarter-size) of baking soda into your palm along with your favorite shampoo. Shampoo as usual and rinse thoroughly. Baking soda helps remove the residue that styling products leave behind so your hair is cleaner and more manageable.

55. For lustrous hair with more shine, keep brushes and combs clean. Remove natural oil build-up and hair product residue by soaking combs and brushes in a solution of 1 teaspoon of baking soda in a small basin of warm water. Rinse and allow to dry.

56.For sunburn use a paste of baking soda and water it will help relive the burning and will help you from peeling as bad.

57.Dissolve 3- 4 tablespoons of baking soda in a basin of warm water and soak your feet. Sprinkle baking soda in your hand and gentle massage your feet.

Tuesday, December 14, 2010

How To: Roast Garlic


  1. Cut about 1/2 off the top of the garlic.
  2. Cut the roots so that the garlic will sit flat.
  3. Remove the papery skin from the garlic, but leave enough so that the cloves stay together.
  4. Put garlic in a small casserole dish or baking pan, drizzle with olive oil and cover with a lid or foil.
  5. Bake in a preheated 325 degree oven for 1 hour.
  6. Remove and let it cool until you can handle it.


Monday, November 8, 2010

Perfect Pie Crust

Perfect Pie Crust


All Butter Crust for Sweet and Savory Pies (Pâte Brisée)


Ingredients

  • 2 1/2 cups all-purpose flour, plus extra for rolling
  • 1 cup (2 sticks or 8 ounces) unsalted butter, very-cold, cut into 1/2 inch cubes
  • 1 teaspoon salt
  • 1 teaspoon sugar
  • 6 to 8 Tbsp ice water

Direction

  • Cut the sticks of butter into 1/2-inch cubes and place in the freezer for 15 minutes to an hour (the longer the better) so that they become thoroughly chilled.
making-dough.jpg
Dough is ready to shape.

  • Combine flour, salt, and sugar in a food processor; pulse to mix. Add butter and pulse 6 to 8 times, until mixture resembles coarse meal, with pea size pieces of butter. Add ice water 1 Tbsp at a time, pulsing until mixture just begins to clump together. If you pinch some of the crumbly dough and it holds together, it's ready. If the dough doesn't hold together, add a little more water and pulse again.
pie-crust-crumbles.jpg pie-crust-disc.jpg
  • Remove dough from machine and place in a mound on a clean surface. Gently shape into 2 discs. Knead the dough just enough to form the discs, do not over-knead. You should be able to see little bits of butter in the dough. These small chunks of butter are what will allow the resulting crust to be flaky. Sprinkle a little flour around the discs. Wrap each disc in plastic wrap and refrigerate at least 1 hour, and up to 2 days.
  • Remove one crust disk from the refrigerator. Let sit at room temperature for 5-10 minutes in order to soften just enough to make rolling out a bit easier. Roll out with a rolling pin on a lightly floured surface to a 12-inch circle; about 1/8 of an inch thick. As you roll out the dough, check if the dough is sticking to the surface below. If necessary, add a few sprinkles of flour under the dough to keep the dough from sticking. Carefully place onto a 9-inch pie plate. Gently press the pie dough down so that it lines the bottom and sides of the pie plate. Use a pair of kitchen scissors to trim the dough to within 1/2 inch of the edge of the pie dish.
  • Add filling to the pie.
  • Roll out second disk of dough, as before. Gently place onto the top of the filling in the pie. Pinch top and bottom of dough rounds firmly together. Trim excess dough with kitchen shears, leaving a 3/4 inch overhang. Fold the edge of the top piece of dough over and under the edge of the bottom piece of dough, pressing together. Flute edges using thumb and forefinger or press with a fork. Score the top of the pie with four 2-inch long cuts, so that steam from the cooking pie can escape.


All Butter Crust with Almonds

Ingredients
  • 2 cups all-purpose flour, plus extra for rolling
  • 1/2 cup finely ground blanched almonds or almond flour
  • 1 cup (2 sticks) unsalted butter, very-cold, cut into 1/2 inch cubes
  • 1 teaspoon salt
  • 1 heaping teaspoon brown sugar
  • 6 to 8 Tbsp ice water, very cold
Follow directions as for the All Butter Crust Pâte Brisée, but with the above ingredients. Include the ground almonds in with the flour and the salt and sugar in step 2 above.


To Pre-Bake a Pie Crust

If your recipe calls for a pre-baked crust, as many custard pie recipes do, follow all the steps above until you get to the point where it says to put in the filling. Note that you will need to make only a half recipe if you are only doing a bottom crust. Freeze the crust it for at least a half hour, until chilled. This is an important step in pre-baking. Otherwise the crust will slip down the sides.
pie-weights.jpg
Preheat your oven to 350°F. When the pie crust is sufficiently chilled, line the pie crust with parchment paper, wax paper, or aluminum foil. Fill at least two-thirds full with pie weights - dry beans, rice, or stainless-steel pie weights. Bake with weights for 20 minutes. Remove from oven, cool a few minutes and carefully remove pie weights. Poke small holes in the bottom of the pie crust with a fork and return to oven (without the weights) and cook for an additional 10 minutes, until the crust is golden. Cool completely before filling. You may need to tent the edges of the pie with aluminum foil when you bake your pie, to keep the edges from getting too dried out and burnt.


Combination Butter and Shortening Crust

Ingredients for one double-crust 9 inch or 10 inch pie:
  • 2 1/2 cups all purpose flour
  • 1 teaspoon salt
  • 2 Tablespoons sugar
  • 3/4 cup (a stick and a half) unsalted butter, chilled, cut into 1/4 inch cubes
  • 1/2 cup of all-vegetable shortening (8 Tbsp)
  • 6-8 Tablespoons ice water
  • Combine flour, salt, and sugar in a food processor; pulse to mix. 
  • Add the butter and pulse 4 times. 
  • Add shortening in tablespoon sized chunks, and pulse 4 more times. The mixture should resemble coarse cornmeal, with butter bits no bigger than peas. Sprinkle 6 tablespoons of ice water over flour mixture. Pulse a couple times. If you pinch some of the crumbly dough and it holds together, it's ready. If the dough doesn't hold together, keep adding water, a tablespoon at a time, pulsing once after each addition, until the mixture just begins to clump together.
  • Remove dough from machine and place in a mound on a clean surface. 
  • Divide the dough into 2 balls and flatten each into 4 inch wide disks. Do not over-knead the dough! Dust the disks lightly with flour, wrap each in plastic, and refrigerate for at least an hour, or up to 2 days before rolling out.
  • After the dough has chilled in the refrigerator for an hour, you can take it out to roll. If it is too stiff, you may need to let it sit for 5-10 minutes at room temperature before rolling. 
  • Sprinkle a little flour on a flat, clean work surface and on top of the disk of dough you intend to roll out.  
  • Using a rolling pin, apply light pressure while rolling outwards from the center of the dough. Every once in a while you may need to gently lift under the dough to make sure it is not sticking. You have a big enough piece of dough when you place the pie tin or pie dish upside down on the dough and the dough extends by at least 2 inches all around.
  • When the dough has reached the right size, gently fold it in half. Lift up the dough and place it so that the folded edge is along the center line of the pie dish. 
  • Gently unfold. Do not stretch the dough.
  • If you are only making a single crust pie, use a pair of kitchen scissors to trim the dough to within 1/2 inch of the lip of the dish. Tuck the overhang underneath itself along the edge of the pie dish. Use your fingers in a pinching motion, or the tines of a fork to crimple the edge of the pie crust. 
  • If you are making a double crust pie, roll out the second disk of dough. Gently place onto the top of the filling in the pie. Use a kitchen scissors to trim the overhang to an inch over. Fold the edge of the top piece of dough over and under the edge of the bottom piece of dough, pressing together. Finish the double crust by pressing against the edges of the pie with your finger tips or with a fork.
  • Use a sharp knife to cut vents into the top of the pie crust, so the steam has a place to escape while the pie is cooking.   
  •  
Optional Before scoring, you may want to paint the top of your crust with an egg wash (this will make a nice finish).

Egg Wash

A lovely coating for a pie can be achieved with a simple egg wash.
  • 1 Tbsp heavy cream, half and half, or milk
  • 1 large egg yolk
Beat egg yolk with cream and brush on the surface of the pie with a pastry brush.


Wednesday, September 29, 2010

Sofito

This is a MUST have in our household. This is usually the foundation for seasoning any dish...

Ingredients for making sofrito.


Ingredients
  • 2 medium green peppers, seeds removed
  • 1 red sweet pepper, seeds removed
  • 4 medium onions, peeled
  • 1 head of garlic, peeled
  • 1 bunch cilantro leaves
  • 1 tsp salt
  • 1 tsp pepper
  • 2 tbsp vinegar
Directions:

  1. Peel Garlic, onions, and chop all ingredients.
  2. add all ingredients to food processor or blender
  3. thoroughly blend ingredients to an even consistency.
For immediate use, store in glass container and keep refrigerated. You can store additional sofrito for future use.


Thursday, September 23, 2010

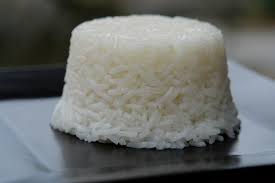
White Rice

http://laylita.com/recipes/2008/02/28/how-to-cook-rice/


Good rice can make or break your meal. The basic rule for fluffy rice is 1 cup of water more than the amount of rice. For example, if you are cooking 3 cups of rice, add 4 cups of water. So, basically, measure your rice (We prefer Long grain), add the water, salt, and a few tsp of cooking oil. Place on high heat, till the water is no longer visible above the rice. Now, cook on low heat and place the lid on, turning the rice now an then. I have also found that the pot in which you cook it, can make all the difference. Now, if you are like my husband and prefer sticky rice (must be a Filipino thing and short grain rice) use 1 1/2 cup of water over, and no salt.


Wednesday, August 4, 2010

Love a clean Grill

Just few tips we like to follow for a clean grill:

Cleaning Your Grill

  • Cleaning your grill rack with aluminum foil is a snap. All you need to do is crumble up a few pieces of aluminum foil and use it in place of a scrub brush when the grill is still warm. This trick is great because it eliminates a nasty grill brush, cleans immediately and eliminates the need to deep clean the grill so often. If you have more time, and need a deeper clean, completely cover the rack with aluminum foil, the shiny side to the grill , and place it on a hot grill for 30 minutes with the lid on. The grill acts like a self-cleaning oven and essentially cooks off the grit and grim.
  • To clean the outside of your grill, dip a cloth into a canister of waterless hand cleaner (such as GOJO Creme Waterless Hand Cleaner). Rub the cleaner onto the outside of a cool grill with the cloth. Work it into the metal well, paying special attention to any grease or barbecue sauce spots. Do not rinse; instead take paper towels and buff the grill surface. The dirt will be replaced by a great shine.
  • In order to keep the grill rack clean simply spray non-stick cooking spray on the clean grill to prevent build up and make future cleanings faster and easier. This works great on gas and charcoal grills.
  • To clean the cook pan bottoms, use this simple tip: before setting a pan or pot on the grill rack to warm barbecue sauce or cook additional food, rub the bottom of the pan with a bar of soap . Once you have finished cooking, the soap layer will help to remove the soot on the bottom of the pan.
  • Another way to clean the grill is to take the rack and wrap it in paper towels. Spray it with ammonia, and place the grill in a large garbage bag. Leave the grill overnight, and then the next day, carefully open the garbage bag (there will be a lot of fumes) and wipe the grill off with the paper towels you wrapped around it. Hose the grill off and place it on a hot grill and let it cook for five minutes before you place the food on the grill in order to bake off any residue.
  • One last quick tip: if the rack is really dirty, throw a cool grill on the grass upside down over night. The dew will soak the dirt right off the grill!